 One of the things that many people are doing wrong from the start is creating their online presence using blogging services like Blogspot.com or WordPress.com(even though we love WordPress.org).
The reason I don’t like these sites is that your content belongs to them(read their TOS carefully) while at the same time they can take your blog down whenever they wish.
If you are serious about blogging and internet marketing then you must invest some time so that you can build your own blog under your own domain and hosting account, because this way you can own and control everything.
In the past those tasks used to be a real pain in the ass for anyone that didn’t know how to deal with installing databases and using phpMyAdmin and MySql.
Those days are long gone since many of the well-known bloggers now use the best open source blog tool called WordPress. This huge growth of WP installations made several hosting management solutions like cPanel to incorporate scripts that can make a task like installing WordPress as easy as counting from 1 to 12.(more or less )
If you buy hosting services from providers like HostGator, then you can use their cPanel scripts and get your own blog running in 12 minutes – making the first step into the blogging sphere and one step closer towards a regular blogger in the future(which at some point will fetch you a nice income!).
Register a domain and hosting account with Hostgator.com
The baby plan costs $96 per year, being able to host unlimited domains and websites is my fav.
HostGator is one of the most respected and affordable hosting services worldwide.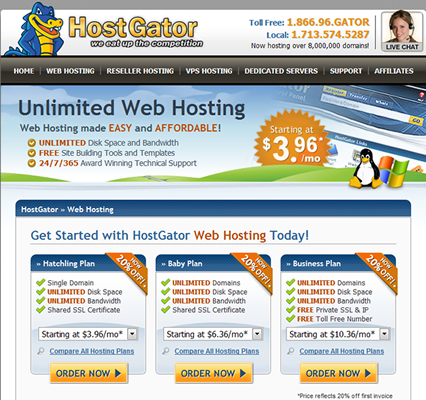
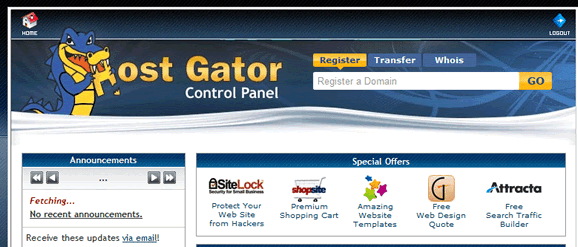
Log into cPanel
Select the login link sent to your email by HostGator and log into cPanel using the provided username and password credentials.
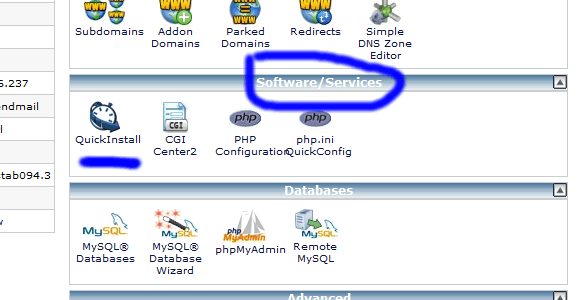
Find cPanel’s Quick Install option
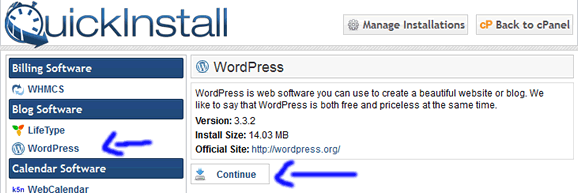
Scroll down the page and find the “Software/Services” tab and select the “Quick Install” option.
Install WordPress
In the new page that opens, on the left column and under the “Blog Software” tab, select the WordPress option and then go to the right side of the page and select “Install”.
WordPress blog details
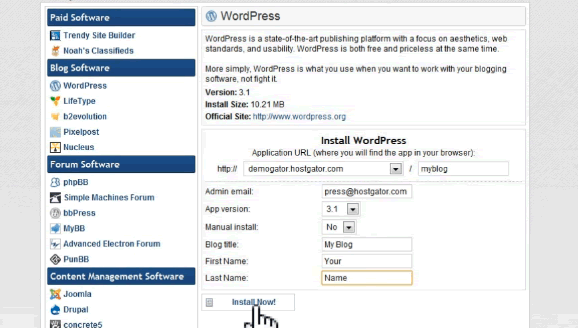
Below that option enter your WordPress blog details:
- Application URL: This is the URL where your WordPress installation will be installed, you can leave it as it is unless you want to host your blog under a subdirectory
- App version: 3.4.1,(don’t mind the version that the screenshot shows since its outdated)
- Manual Install: No
- Admin email: this is the email where your blog will send you notifications such as comment alerts etc.
- Blog Title: Here you can enter your blog title
- First Name: Your First Name
- Last Name: Your Last Name
(You can change any of these details at a later time if you wish)
When done select “Install Now!” and wait for a few seconds for the magic to happen!!!
End of WordPress installation
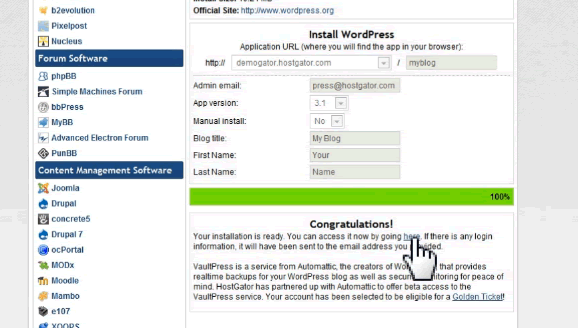
Wait for 4-5 seconds and you’ll see a progress bar loading up to 100% and just after your will receive the confirmation message that your WordPress installation is ready.
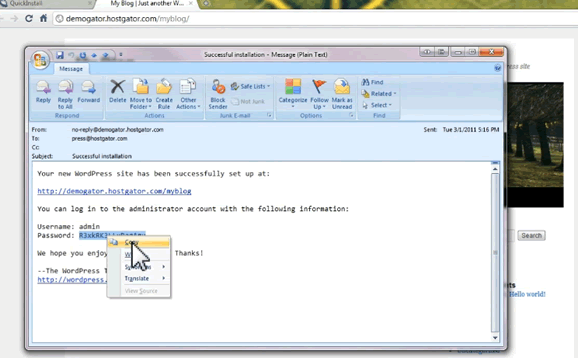
The same message lets you know that you are going to receive an email with details for this WordPress installation such as WordPress Dashboard credentials(username and password) which you can use later in order to log into the Dashboard.
Browse your blog for the first time
Open your website URL and take the first look at your brand new WordPress blog. Now it’s the time to feel proud about it since even though installing WordPress is considered more or less simple, not many people can get to where you are right now!
WordPress Dashboard credentials
After browsing your blog for the first time you will still have some more steps to do. The next step will be logging into your WordPress Dashboard in order to publish your posts.
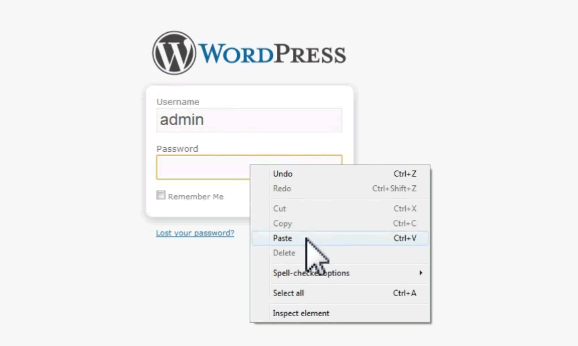
Open the email you received by HostGator(or your chosen hosting provider) and copy/paste the password provided because you will need it in the next step.
Log into WordPress Dashboard
Browse your WordPress Dashboard by visiting the following URL:
http://www.yourblog.com/wp-admin
“wp-admin” is the only thing you must add just after your blog URL. When pressing enter in the new page that opens give the username: admin while in the password field and just paste the password you copied in the previous step.
When done press “Log in”.
Create your first post
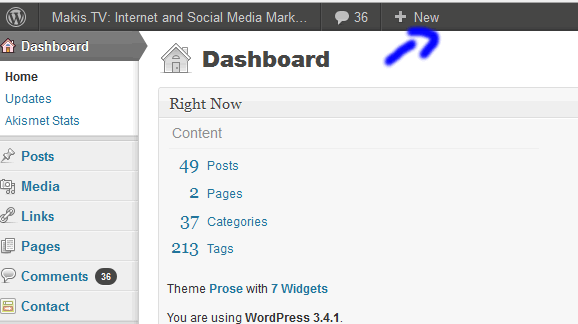
In the new page that opens, called Dashboard, select on the top menu bar the “New Post” option and you are ready to write your first blog post!
Publish your first post
Enter your post title and text; you can try to use the html text editor for applying custom styling in your text(such as making some of it bold or italic).
When done select the “Publish” option found on the top right corner of the Dashboard.
Customize or change your theme
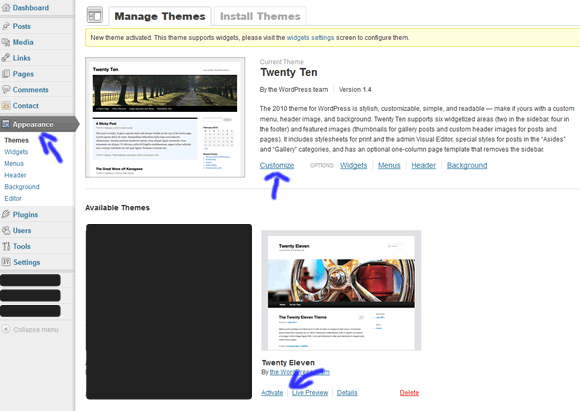
If you feel comfortable browsing through the Dashboard you can try to open the “Theme” section located on the left sidebar of your Dashboard, hover over the “Appearance” option and then select “Themes”.
In the new page that opens you can customize your current theme options or select another theme for your blog.
Video guide
Below I’m attaching a video that explains everything just in case you have any questions.
WordPress is your best friend!
WordPress is a great tool that can get you started blogging in no time without having to pay barely anything for it.
Just select you desired hosting service(our personal favourite is HostGator) and use its cPanel add-ons in order to create your own WordPress blog.
In just 12 minutes you’ll be up and running your first blog ever! As an Asian proverb says, “The first step is half the journey“, and you are about to make it happen!
You are only 12 minutes away!



Hi, I’ve tried doing exactly what you say here, but when I press install, it’s says that there’s an error because those files already exist??
What can I do? I am technologically inept, I have NO idea what to do!!
Hi Sandra.
Please let me know the exact step that you bump into the “those files already exist” message?
It could be that WordPress has already been installed so you must follow this tutorial from “Browse your blog for the first time” paragraph.